What does the wall location line do in Revit?
Think of the wall location line as the line which the wall is drawn upon. The thickness of the wall is positioned relative to this location line. The wall location line gives us control over the position of the wall when its width changes.
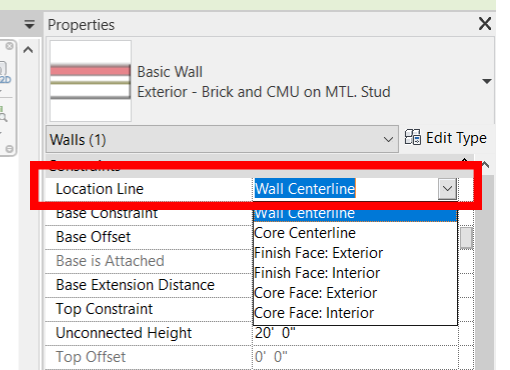
The location line has 6 options.
• Wall Centerline (the default)
• Core Centerline (the center of the defined core of the wall)
• Finish Face: Exterior
• Finish Face: Interior
• Core Finish: Exterior
• Core Finish: Interior
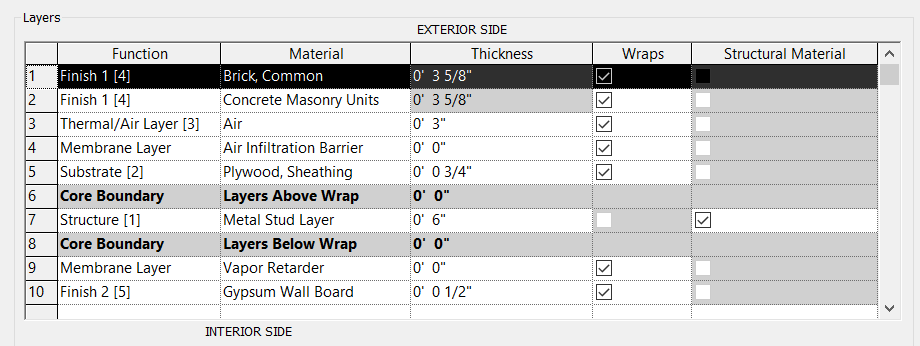
When a wall has a multiple layers, you control the position of each layer, and which layers are part of the walls core. In the screen capture below note which side of the wall is exterior, and which is interior. Also, note which layers are between the “Core Boundary” layers. When editing the structure of your wall you can insert and delete layers and mover layers up or down on the list as desired.
Suggestions:
• Demising walls: Use Centerline (so the wall grows evenly on both sides)
• Shaft Walls: Use Finish Face: Interior (so changes to wall width do not affect size of the shaft opening.)
• Corridor Walls: Use Finish Face: Exterior (so clear corridor widths would be maintained and the wall grows to the adjacent rooms)
• Prior to adjusting the width or type of the wall you can change the walls location line to ensure the change to width results in the desired change to the wall position.
Download PDF – KB-210122-Wall location line
