What do the 2D and 3D icons next to column grid and level lines in Revit do?
Levels and grids are more than just a line across the page indicating an important reference, they are in fact planes. Revit allows you to adjust the extent of that plane (3D) as well as override the graphics in each view (2D) independently of each other.
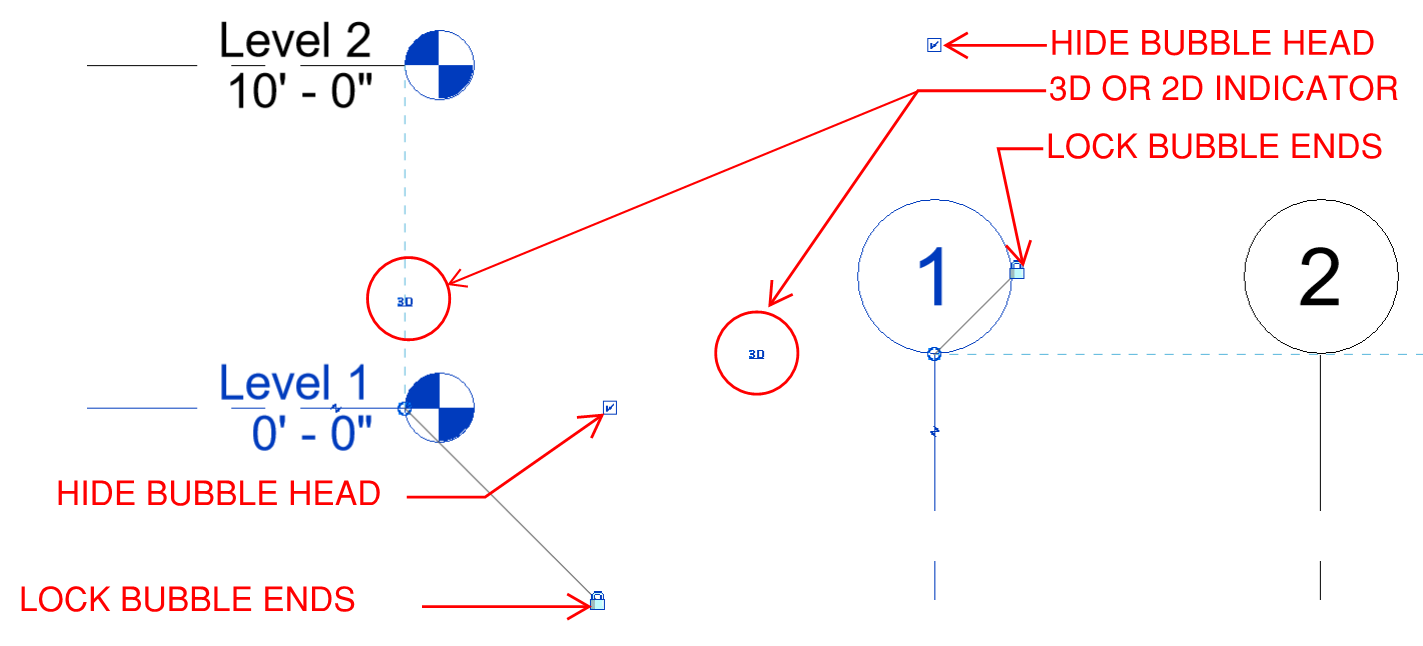
First to understand the level and grid options, at each end of the line, you will notice that there are the following:
• Check box to show or not show the bubble head.
• A lock indication allowing the ends to move together with aligned ends. This will also show with a dashed reference plane showing which levels or grids are aligned and will move together.
• A 3D (or 2D) indicator.
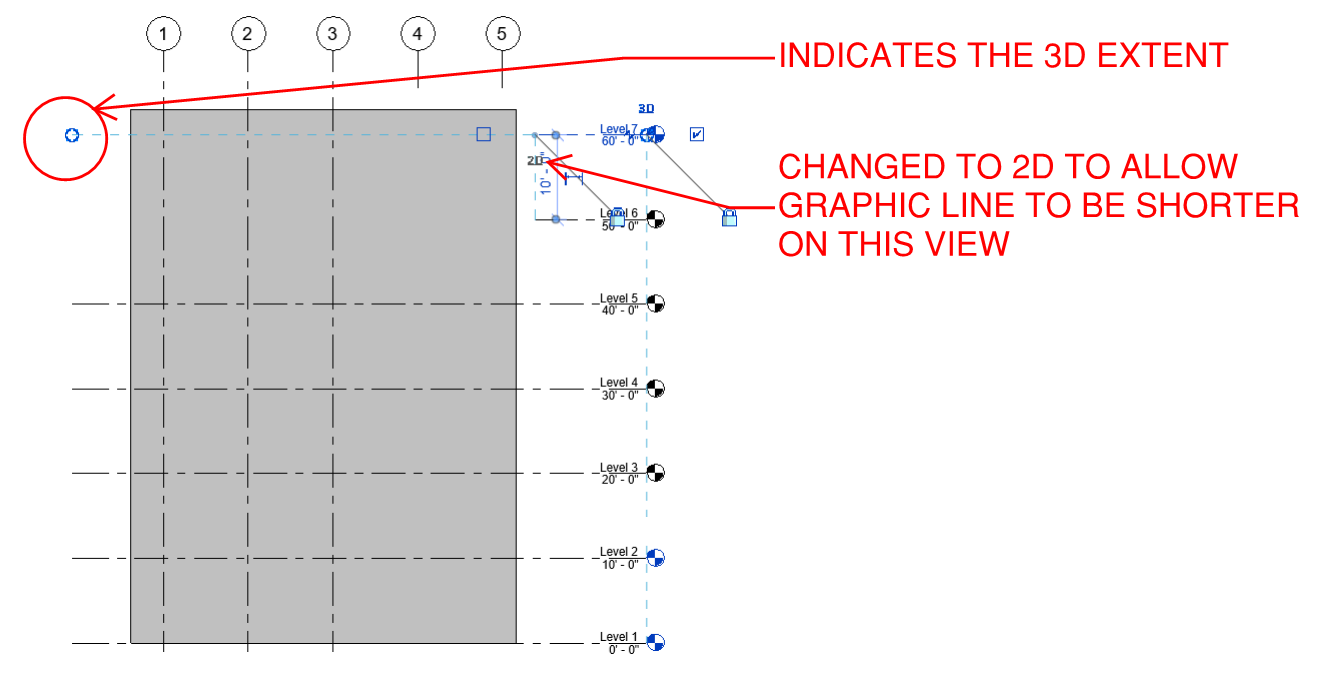
When you toggle the 3D to 2D the level or grid graphic will disassociate itself from the 3D plane it represents and will allow you to drag the graphic on the drawing as needed. This is great when you do not want the levels or grids to show thru the drawing but still need the plane to cut. See the example below of an elevation view where grids 4 and 5 and levels 6 and 7 were toggled to 2D to allow the extent line to be short.
OTHER NOTES
• When you crop a view the software automatically applies a 2D override to any grid or level lines that it crosses, and it will adjust automatically with the crop region.
• You can manually override that by dragging the grips.
• You can right click over grids and level lines for options to reset to crop or reset to 3D extents.
